Making modular videogames
I recently discovered that despite billing myself as a game programmer, I don’t generally enjoy games programming. As someone whose primary reasons for writing software include a love for designing elegant, extensible, and reusable systems, I have often found the culture and techniques associated with videogame programming to be alienating and stressful. In my experience, the process of engineering a game usually involves writing increasingly disorienting spaghetti code in response to increasingly obscure technical problems. Even when it doesn’t, I’ve rarely felt that the code I’ve written has had real worth beyond the game it was written for. The code for an individual game can be highly specialized, and finding and extracting the bits that have wider applications can be non-trivial.
I want my games to be modular. If I make a game that contains certain pieces that someone finds interesting, I want it to be easy for that person to use those pieces in their own work. If someone wants to create their own pieces from scratch, I want that person to enjoy creating them, and for it to be only as challenging as they want it to be.
For me, achieving such modularity required that I look for alternatives to the standard models of videogame programming. The alternative I have settled on is a design pattern known as the object/component model. Thankfully, my discovery that I don’t enjoy conventional game programming coincided with the realization that I quite enjoy building tools for making games, so I decided to create my own object/component framework for making videogames. With this article, I intend to demonstrate what exactly the object/component model is, how I have used it in my framework, and how you might use and benefit from it in your own projects.
But first, let’s step back for a bit.
Objects
Most people with experience in basic object-oriented programming are probably familiar with what I call the “inheritance tree” model. In this model, a game program can contain many objects. Each object is an instance of one of any number of classes. Each class is likely descended from a parent class or even a chain of ancestor classes. The code for a game program would thus look like various family trees of classes.
Here is an example of a game, written in Python using the fictional “deckyengine” library, that follows the inheritance tree model. It contains a single object, called dog, that gets drawn to the screen at position (0, 10).
import deckyengine, time

class Drawable(object):
    """a thing that can be drawn to the screen"""

    def __init__(self, x, y, image):
        """constructor function"""

        self.x = x
        self.y = y
        self.image = image

    def update(self):
        deckyengine.drawImage(self.image, self.x, self.y)

class Character(Drawable):
    """a drawable that can move around"""

    def __init__(self, x, y, image, speed):

        self.speed = speed
        super(Character, self).__init__(x, y, image)

    def move(self, direction, speed=None):

        if speed == None:
            speed = self.speed

        if direction > 0:
            self.x += speed
        elif direction < 0:
            self.x -= speed

class Dog(Character):
    """a dog"""

    def __init__(self, x, y):

        super(Dog, self).__init__(x, y, "doggy.png", speed=7)

dog = Dog(0, 10)

while True:
    dog.update()
    time.sleep(1.0/60)
In this program, the Dog class inherits two methods, Character.move and Drawable.update. If I wanted to make the dog run towards the right side of the screen forever, I’d have the option of overriding Drawable.update like so:
class Dog(Character):

    def __init__(self, x, y):

        super(Dog, self).__init__(x, y, "doggy.png", speed=7)

    def update(self):

        # move 7 (self.speed) units to the right on every update cycle
        self.move(direction=1)

        # draw to the screen
        super(Dog, self).update()
Because I added this behavior to the class itself, every future instance of Dog will exhibit it. It would be nice if I could make certain dogs behave differently from others, though. For example, I’d like to be able to move this particular dog using my keyboard. I’ll try adding a new parameter called controllable:
class Dog(Character):

    def __init__(self, x, y, controllable=False):

        self.controllable = controllable
        super(Dog, self).__init__(x, y, "doggy.png", speed=7)

    def update(self):

        if controllable:
            keys = deckyengine.getKeysPressed()

            # move left...
            if "a" in keys:
                self.move(-1)
            # ...or right
            elif "d" in keys:
                self.move(1)
        else:
            # move 7 units to the right on every update cycle
            self.move(1)

        # draw to the screen
        super(Dog, self).update()

dog = Dog(0, 10, True)
However, what if I wanted to sometimes play as a cat? I would have to either copy and paste the new input-handling code to a new Cat class, or move it up into to the Character class for both to inherit. If I wanted cats and dogs to have different, configurable controls, I might have to add more parameters to each class constructor. Right now, our code is simple enough that these possibilities might seem trivial. However, I may eventually want to support a variety of input devices, or give non-playable cats significantly more complex pathfinding AI than “run off the side of the screen and never come back.” Eventually, figuring out which behaviors and settings belong to which class would become a non-trivial design challenge.
Components
The object/component model, like the inheritance tree model, sees a game as a collection of objects. The key difference between the two models is that in an object/component-style game, every object is an instance of the same class, unlike the above example’s separate Dog and Cat classes. What makes each object unique is not what class it comes from, but rather what components are attached to it.
A component is an instance of a class that defines certain behaviors. There can be many different component classes within a single project, but the inheritance trees for these classes are likely to be comparatively shallow. One can go surprisingly far using this model without ever defining a component class that extends another component class. This model may be familiar to some as a variant of the decorator pattern.
Let’s create a game with not one but two dogs by using components and a single root game object class:
import deckyengine, time

class GameObject(object):

    def __init__(self, x, y, componentList=tuple()):
        """
        componentList should be a 2D array.
        the first element of each sub-array is the component class,
        and the remaining elements are the component constructor args
        """

        self.x = x
        self.y = y
        self.components = []

        for component in componentList:
            instance = component[0](*component[1:])
            self.addComponent(instance)

    def update(self):

        for component in self.components:
            component.update()

    def addComponent(self):
        """add a component to this gameObject"""

        self.components.append(component)
        component.gameObject = self

    def getComponent(self, componentClass):
        """return a component from self.components of type componentClass, or None"""

        for c in self.components:
            if type(c) == componentClass:
                return c

    def removeComponent(self):
        """remove a component from this gameObject"""

        for i, c in enumerate(self.components):
            if type(c) == componentClass:
                return self.components.pop(i)

class Component(object):

    def __init__(self):

        self.gameObject = None

    def update(self):
        """this is called on every update frame"""

        pass

class ImageRenderer(Component):
    """a component for drawing an image to the screen"""

    def __init__(self, image):

        self.image = image
        super(ImageRenderer, self).__init__()

    def update(self):

        deckyengine.drawImage(self.image, self.gameObject.x, self.gameObject.y)

class Motor(Component):
    """a component for moving the gameObject around"""

    def __init__(self, speed):

        self.speed = speed
        super(Motor, self).__init__()

    def move(self, direction):

        if direction > 0:
            self.gameObject.x += self.speed
        elif direction < 0:
            self.gameObject.x -= self.speed

dogComponents = [
    [ImageRenderer, "doggy.png"],
    [Motor, 7] # speed = 7
]
dog1 = GameObject(0, 10, dogComponents)
dog2 = GameObject(20, 10, dogComponents)

while True:
    dog1.update()
    dog2.update()
    time.sleep(1.0/60)
In this program, dogs are simply instances of GameObject that contain a certain combination of components. The code blocks for drawing to the screen and moving objects around are entirely independent of each other: not every drawable needs to be movable, and not every movable needs to be drawable. The only thing these two components have in common is that they both reference the x and y properties of the GameObject they are attached to. To demonstrate the modularity this affords, I can create a movable object that looks like a rectangle instead of a dog:
class RectangleRenderer(Component):
    """a component for drawing a rectangle to the screen"""

    def __init__(self, width, height, color):

        self.width = width
        self.height = height
        self.color = color
        super(RectangleRenderer, self).__init__()

    def update():

        deckyengine.drawRectangle(
            self.gameObject.x, self.gameObject.y, self.width, self.height, self.color
        )

movableRect = GameObject(30, 50, [
    [RectangleRenderer, 10, 10, "pink"],
    [Motor, 3]
])
Sometimes, different components connected to a single game object might need to communicate with each other. The GameObject.getComponent method makes this possible. Let’s say that I once again want to create a player-controlled dog:
class InputMotorController(Component):
    """a component that controls a Motor component using keyboard input"""

    def __init__(self, keyLeft, keyRight):

        self.keyLeft = keyLeft
        self.keyRight = keyRight
        self.motor = None

        super(InputMotorController, self).__init__()

    def update(self):

        keys = deckyengine.getKeysPressed()

        if self.motor:
            if self.keyLeft in keys:
                self.motor.move(-1)
            elif self.keyRight in keys:
                self.motor.move(1)
        else:
            self.motor = self.gameObject.getComponent(Motor)

playableDog = GameObject(30, 60, [
    [ImageRenderer, "doggy.png"],
    [Motor, 7],
    [InputMotorController, keyLeft="a", keyRight="d"]
])
My new InputMotorController class, on every update cycle, checks that at least one Motor component is attached to the GameObject. When it finds one, it starts controlling it.
I asked earlier what I would do if I sometimes wanted to play as a cat. Now it’s trivial:
playableCat = GameObject(50, 60, [
    [ImageRenderer, "cat.png"],
    [Motor, 5],
    [InputMotorController, keyLeft="j", keyRight="l"]
])
Turning that same cat into a non-playable character isn’t much more difficult:
class AIMotorController(Component):
    """a component that controls a Motor component autonomously"""

    def __init__(self, maxFrames=30):

        self.maxFrames = maxFrames
        self.frame = 0
        super(AIMotorController, self).__init__()

    def update(self):

        keys = deckyengine.getKeysPressed()

        if self.motor:
            # pace back and forth

            if frame < self.maxFrames / 2:
                self.motor.move(-1)
            else:
                self.motor.move(1)

            # increment frame, or wrap back around to 0
            self.frame = (self.frame + 1) % self.maxFrames

        else:
            self.motor = self.gameObject.getComponent(Motor)

playableCat.removeComponent(InputMotorController)
playableCat.addComponent(AIMotorController)
Having the InputMotorController and AIMotorController each move the game object on their own would result in duplicated code. This sort of component communication allows the GameObject movement code to be abstrated out and shared among any components that might need to move a game object.
By this point, you can hopefully imagine how these component classes could be modified or joined by new components to allow for cats that can jump, dogs that can tell when they are near other characters, animals that animate while moving, or other functionality we haven’t even thought of yet.
The right tools
Unity is an engine for 3D and 2D games, and is probably the most popular game tool to use the object/component model. I knew before I started developing my framework that its greatest influence would be Unity.
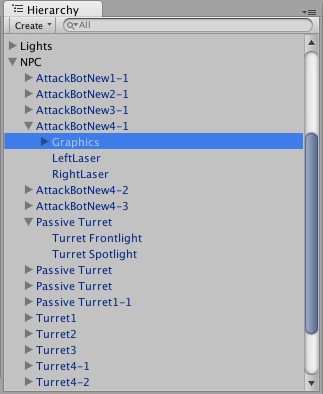
In Unity, a game consists of one or more scene files, and each scene consists of any number of game objects. Every game object has zero or more components, as well as a transform, a table defining various parameters relating to the object’s geometric state (its position, orientation, and size).
Critically, game objects in a scene are organized hierarchically. In other words, a game object can have other game objects attached to it as children. A game object’s transform parameters are relative to its parent’s – for example, if an object is rotated 90 degrees clockwise while its parent is rotated 90 degrees counterclockwise, it would not appear rotated at all.
I wanted my framework to break away from Unity on several counts. First, I wanted to focus exclusively on 2D games; building a 3D framework seemed beyond the scope of the project and my grasp on mathematics. Second, I wanted the core of the framework to be small, lightweight, and without the sort of overhead and baggage that would be expected from an engine that used to be a multi-gigabyte download. Third, I wanted the tool, and the games it created, to be cross-platform with at least some Linux support. Last, I wanted it to be truly free and open-source. These criteria led to the natural choice of using LÖVE as its underlying engine.
LÖVE, a.k.a. Love2D, is an open-source, cross-platform engine for 2D games. It contains an interpreter for the Lua programming language, which means that Love2D games can be written entirely in Lua. Lua is an imperative language with some interesting features. It is dynamically typed with only six data types (number, string, boolean, function, table, and nil). Functions are declared and can be passed around like any other value, which means creating throwaway anonymous functions is easy and encouraged. Whereas most languages will throw an error when you attempt to access an undeclared variable, Lua allows you to access them just like declared variables (their type and value will both be nil). Tables are Lua’s sole data structure; they can be used as one would use arrays, dictionaries, objects, and even functions in other languages. Tables also support prototype-based inheritance, which means that they can function as makeshift classes.
All remaining code samples in this article will be in Lua. I think it is a very beginner-friendly language, moreso than Python, and I will do my best to explain its quirks.
As to the name of my framework, I decided to name it Lass because girls rock.
Hello world
Lass takes its basic game structure from Unity. A game has at least one GameScene, and attached to the scene is any number of GameObjects. Every GameObject has a Transform, any number of Components, and any number of children. A GameObject’s transform property is relative to its parent’s, although its absolute position and orientation in the game world is also available through the GameObject.globalTransform property.
GameObject and GameScene are both descendants of a class called GameEntity. Essentially, a scene can be thought of as a game object that cannot have any components, only child entities.
Here is one way to instantiate a game object:
-- import the core lass library
lass = require("lass")

-- create a scene with one object
myScene = lass.GameScene()
myObject = lass.GameObject(myScene, "My Object", {
    position = {
        x = 0,
        y = 20,
        z = 0       -- third dimension is used for layering
    },
    size = {
        x = 0,
        y = 0,
        z = 0
    },
    rotation = 0,   -- degrees, not radians
})
You can also use the Transform and Vector3 classes instead of plain tables:
lass = require("lass")
geometry = require("lass.geometry")

myScene = lass.GameScene()
t = geometry.Transform(
    geometry.Vector3(0, 20, 0), -- a 3D Euclidean vector
    geometry.Vector3(0, 0, 0),
    0
)
myObject = lass.GameObject(myScene, "My Object", t)
Regardless of which method is used, the GameObject constructor ensures that GameObject.transform will yield an instance of Transform, and GameObject.transform.position will yield an instance of Vector3.
There are a few more things you should know about Lua before we continue. First, as mentioned above, objects are just tables, and an object’s properties are just that table’s key/value pairs. In other words, myObject.transform is merely syntactic sugar for myObject["transform"]. Second, casting any value to a boolean, including 0 and the empty string, will result in true unless the original value is false or nil. Third, if a function is called with only some of its parameters defined, the remaining parameters are assumed to be nil. Fourth, calling gameObject:update() is equivalent to calling gameObject.update(gameObject).
Although the above code demonstrates that it is possible to instantiate game objects and scenes manually, this is not usually necessary. More commonly, the GameScene.load method is used to build up objects from a scene file. With all of this in mind, here’s what “Hello World” looks like in Lass:
----------------------
-- TextRenderer.lua --
----------------------

lass = require("lass")
class = require("lass.class")
geometry = require("lass.geometry")

-- constructor
local TextRenderer = class.define(lass.Component, function(self, arguments)

    -- if the left side of the 'or' operation is nil or false, the right side is used.
    -- we can use this feature to give default values to function parameters.
    arguments.text = arguments.text or ""
    arguments.color = arguments.color or {0,0,0}
    arguments.fontSize = arguments.fontSize or 18
    arguments.boxSize = arguments.boxSize or 500
    arguments.align = arguments.align or "left"

    -- call the super constructor
    self.base.init(self, arguments)
end)

-- the following line is equivalent to 'function TextRenderer.awake(self)'
function TextRenderer:awake()
    -- called as soon as the component is attached to a game object

    -- love2D silently adds the 'love' module to the global scope at startup,
    -- so we never have to explicitly import it

    self.font = love.graphics.newFont(self.fontSize)
end

function TextRenderer:draw()
    -- called on every draw frame

    -- the gameObject's global transform is internally recalculated on every update.
    -- it gives us the object's absolute position and rotation.
    -- gameObject.transform would only gives us these parameters relative to its parent's

    local gt = self.gameObject.globalTransform
    local ySign = 1

    -- see settings.lua below
    if self.gameScene.settings.graphics.invertYAxis then
        ySign = -1
    end

    love.graphics.setFont(self.font)
    love.graphics.setColor(self.color)
    love.graphics.printf(
        self.text,
        gt.position.x,
        gt.position.y * ySign,
        self.boxSize,
        self.align
    )
end

-- this specifies what is returned when 'require("TextRenderer")' is called
return TextRenderer
-------------------
-- mainscene.lua --
-------------------

-- a scene file

return {gameObjects = {

  -- a single game object
  {

    name = "Text Object",

    transform = {
      -- unspecified values (z, rotation, size) are filled by the Transform constructor
      position = {
        x = 0,
        y = -10
      }
    },

    components = {

      -- a single component
      {
        script = "TextRenderer",
        arguments = {
          text = "hello world!",
          color = {100,100,0},
          fontSize = 24,
          align = "center"
        }
      }

    }
  },
}}
------------------
-- settings.lua --
------------------

-- a table of default settings for all scenes in the game

return {
  -- the filename of the first scene to be loaded
  firstScene = "mainscene.lua",

  -- window settings
  window = {
    width = 320,
    height = 224,
    title = "hello"
  },

  -- miscellaneous graphics settings
  graphics = {
    -- in love2D, y=0 is at the bottom of the screen by default.
    -- inverting the y axis places y=0 at the top of the screen
    invertYAxis = true
  }
}
--------------
-- main.lua --
--------------

-- the entrypoint of the game, where special love2D callbacks are declared

local lass = require("lass")

local scene = {}

function love.load()
    scene = lass.GameScene()
    scene:loadSettings("settings.lua")

    -- because we already declared the filename of the main scene in settings.lua,
    -- the following line is equivalent to 'scene:load("mainscene.lua")'
    scene:load()
end

-- ellipses allow for variable numbers of arguments
function love.draw(...)
    scene.draw(scene, ...)
end

function love.update(...)
    scene.update(scene, ...)
end

function love.quit(...)
    scene.quit(scene, ...)
end
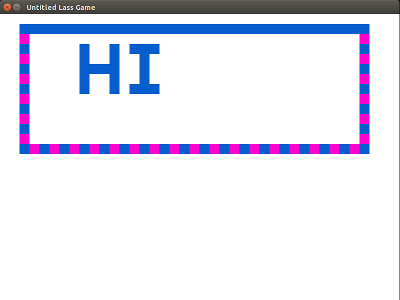
The result of our labour:
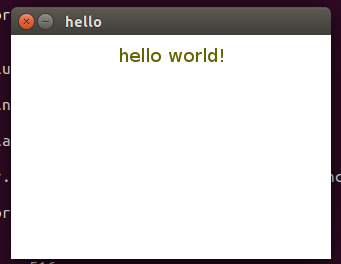
There’s a lot going on here behind the curtain. When the game starts up, Love2D searches for main.lua and runs love.load, triggering the scene’s load function. Within scene.load, the scene instantiates every game object, and that game object’s components, declared in its scene file. Love2D then turns the other built-in callback functions into wrappers for GameScene.draw, GameScene.update, and GameScene.quit.
GameScene.update triggers a trickle-down effect: it finds a game object in the top level of the game object hierarchy (in this case, the one called “Text Object”) and calls that game object’s update function, which in turn calls the update function of each of its components. After that object finishes updating, the update function is called on each of its children. This traversal of the object graph is depth-first.
GameScene.draw works a bit differently. First, it figures out which game objects in the scene are deemed to be “drawable” (that is, which ones have at least one component with a .draw function). Then, it sorts those objects by their globalTransform.position.z values, allowing you as a developer to specify objects’ relative positioning should they overlap. Finally, it calls GameObject.draw for each object.
Because printing text to the screen is such a potentially helpful feature, the Lass standard library includes a text rendering component. That means that it can be added to game objects in any Lass game by specifying "lass.builtins.graphics.TextRenderer" as the script name. You can look at its full source code here.
Here are some other key modules in the Lass framework:
- lass—this contains the code for the Component and GameEntity classes and sub-classes.
- lass.geometry—this contains the Vector and Transform classes.
- lass.class—this provides support for all classes in the framework.
Circles
If you got distracted and scrolled through the lass.geometry module I just linked, you may have noticed a Circle class:
local Circle = class.define(Shape, function(self, radius, center)

    assert(type(radius) == "number", "radius must be number")
    assert(class.instanceof(center, Vector2) or not center, "center must be Vector2 or nil")

    self.radius = radius
    self.center = center or Vector2(0, 0)
end)
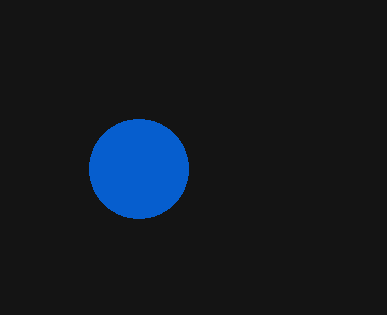
The geometry.Circle class makes it easy to include a standard CircleRenderer component that draws a circle to the screen. Because the source code for the CircleRenderer class is not different in any interesting way from the TextRenderer class, I will not be reproducing it here, but I will link to it for your curiosity. I prefer skipping straight to the scene file:
-------------------
-- mainscene.lua --
-------------------

return {gameObjects = {
  {
    name = "Circle",
    transform = {
      position = {
        x = 180,
        y = -300
      }
    },
    components = {
      {
        script = "lass.builtins.graphics.CircleRenderer",
        arguments = {
          color = {6, 94, 206},
          radius = 50
        }
      }
    }
  }
}}
------------------
-- settings.lua --
------------------

return {
  firstScene = "mainscene.lua",
  window = {
    width = 960,
    height = 600
  },
  graphics = {
    backgroundColor = {20,20,20},
    invertYAxis = true
  }
}
Prefabs
Originally, if you wanted to make more than one circle, you would have to manually define each game object using the same components and arguments over and over. This gets annoying quickly, so Lass includes a concept from Unity called the prefab. A prefab (short for “prefabricated object”) is a game object prototype that can be used to create clones.
Prefabs, like scenes, are stored in Lua modules. A prefab is declared in mostly the same way that a single game object would be declared, except that the transform is optional.
Here is a circle prefab file:
----------------------
-- circleprefab.lua --
----------------------

return {
  name = "Circle",
  components = {
    {
      script = "lass.builtins.graphics.CircleRenderer",
      arguments = {
        color = {6, 94, 206},
        radius = 50
      }
    }
  }
}
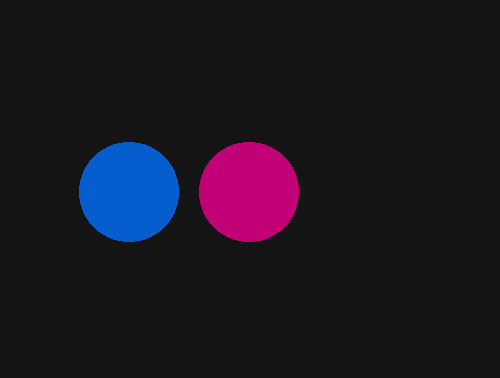
Now I can make two circles:
-------------------
-- mainscene.lua --
-------------------

return {gameObjects = {
  {
    name = "Blue Circle",
    transform = {
      position = {
        x = 180,
        y = -300
      }
    },
    prefab = "circleprefab.lua"
  },

  {
    name = "Magenta Circle",
    transform = {
      position = {
        x = 300,
        y = -300
      }
    },
    prefab = "circleprefab.lua",

    -- override arguments for the prefab components
    prefabComponents = {
        {
          script = "lass.builtins.graphics.CircleRenderer",
          arguments = {
            color = {192, 0, 116},
            -- if radius is not specified, the original radius (50) will be used
          }
        }
    }
  }
}}
The object graph
Here’s a thought: what if we could make the magenta circle look like it’s orbiting around the blue one? Perhaps one way to accomplish this is to make the former a child of the latter. Because each game object’s transform is relative to its parent’s, rotating the parent in place will cause the child to rotate around it.
First, I’ll create a component class that constantly rotates the object counterclockwise.
-----------------
-- Rotator.lua --
-----------------

lass = require("lass")
class = require("lass.class")

local Rotator = class.define(lass.Component, function(self, arguments)

    arguments.degreesPerSecond = arguments.degreesPerSecond or 180
    self.base.init(self, arguments)
end)

function Rotator:update(dt)

    -- dt is the number of seconds that have elapsed since the last update.
    -- if I rotate gameObject by (dt * 180) on every update, it will take
    -- one second to rotate 180 degrees.
    self.gameObject:rotate(dt * -self.degreesPerSecond)
end

return Rotator
Confused about where dt came from? Remember that in Lua, a function can be passed any number of parameters, regardless of how many are declared in the function signature. GameScene.update has been passing dt to GameObject.update all along; we just haven’t had any use for it yet.
Next, I’ll update the circle prefab:
----------------------
-- circleprefab.lua --
----------------------

return {
  name = "Circle",
  components = {
    {
      script = "lass.builtins.graphics.CircleRenderer",
      arguments = {
        color = {6, 94, 206},
        radius = 50
      }
    },
    {
      script = "Rotator",
      arguments = {}
    }
  }
}
Finally, the scene:
-------------------
-- mainscene.lua --
-------------------

return {gameObjects = {
  {
    name = "Blue Circle",
    transform = {
      position = {
        x = 200,
        y = -300
      }
    },
    prefab = "circleprefab.lua",
    children = {
      {
        name = "Magenta Circle",
        transform = {
          position = {
            x = 150,  -- absolute x:  200 + 150
            y = 0,    -- absolute y: -300 + 0
            z = 1
          }
        },
        prefab = "circleprefab.lua",

        prefabComponents = {
          {
            script = "lass.builtins.graphics.CircleRenderer",
            arguments = {
              color = {192, 0, 116},
            }
          }
        }
      }
    }
  }
}}
The result:
As you can perhaps imagine, further nesting results in something like this:
Tile maps
Even with prefabs, having to write out every single object in a scene is tedious if the scene has many objects. That’s why Lass implements a common structure among 2D game tools known as a tile map. A tile map represents a group of objects (tiles) as a two-dimensional array. The position of each element in the array corresponds to the position of the object it represents in the game scene. In other words, if we think of a game scene as a canvas, we can think of each tile as a pixel.
In this case, each non-zero tile in the tile map represents a prefab clone. 1 represents blue squares, while 2 represents purple:
-------------------
-- mainscene.lua --
-------------------

return {gameObjects = {
  {
    name = "Tilemap",
    transform = {
      position = {
        x = 50,
        y = -10,
      },
    },
    components = {
      {
        script = "lass.builtins.tilemap.TileMap",
        arguments = {
          map = {
            {0,0,0,0,0,0,0,0,0,0,0,0,0,0,0,0,0,0,0,0,0,0,0,0,0,0,0,0,0,0,0,0,0,0,0},
            {1,1,1,1,1,1,1,1,1,1,1,1,1,1,1,1,1,1,1,1,1,1,1,1,1,1,1,1,1,1,1,1,1,1,1},
            {2,0,0,0,0,0,0,0,0,0,0,0,0,0,0,0,0,0,0,0,0,0,0,0,0,0,0,0,0,0,0,0,0,0,2},
            {1,0,0,0,0,0,1,0,0,1,0,1,1,1,0,0,0,0,0,0,0,0,0,0,0,0,0,0,0,0,0,0,0,0,1},
            {2,0,0,0,0,0,1,0,0,1,0,0,1,0,0,0,0,0,0,0,0,0,0,0,0,0,0,0,0,0,0,0,0,0,2},
            {1,0,0,0,0,0,1,1,1,1,0,0,1,0,0,0,0,0,0,0,0,0,0,0,0,0,0,0,0,0,0,0,0,0,1},
            {2,0,0,0,0,0,1,0,0,1,0,0,1,0,0,0,0,0,0,0,0,0,0,0,0,0,0,0,0,0,0,0,0,0,2},
            {1,0,0,0,0,0,1,0,0,1,0,1,1,1,0,0,0,0,0,0,0,0,0,0,0,0,0,0,0,0,0,0,0,0,1},
            {2,0,0,0,0,0,0,0,0,0,0,0,0,0,0,0,0,0,0,0,0,0,0,0,0,0,0,0,0,0,0,0,0,0,2},
            {1,0,0,0,0,0,0,0,0,0,0,0,0,0,0,0,0,0,0,0,0,0,0,0,0,0,0,0,0,0,0,0,0,0,1},
            {2,0,0,0,0,0,0,0,0,0,0,0,0,0,0,0,0,0,0,0,0,0,0,0,0,0,0,0,0,0,0,0,0,0,2},
            {1,0,0,0,0,0,0,0,0,0,0,0,0,0,0,0,0,0,0,0,0,0,0,0,0,0,0,0,0,0,0,0,0,0,1},
            {2,0,0,0,0,0,0,0,0,0,0,0,0,0,0,0,0,0,0,0,0,0,0,0,0,0,0,0,0,0,0,0,0,0,2},
            {1,2,1,2,1,2,1,2,1,2,1,2,1,2,1,2,1,2,1,2,1,2,1,2,1,2,1,2,1,2,1,2,1,2,1},
          },
          tileSize = {
            x=20,
            y=20
          },
          tiles = {
            "rectangle1prefab.lua", -- blue
            "rectangle2prefab.lua", -- purple
          },
        }
      },
    }
  }
}}
To manifest the tile map, the TileMap component loops through the 2D array, uses each tile number to reference one of the prefabs, and clones the prefab using a method called GameObject.fromPrefab. (In Lua, lists are 1-indexed, which means that tiles[1] will return "rectangle1prefab.lua" whereas tiles[0] will return nil.)
Because the “tiles” are prefab clones and I’ve already created a Rotator component class, making all purple rectangles spin is only a matter of placing the component onto their prefab:
Events
Game objects don’t necessarily need to be visible. We can also use game objects to represent less “tangible” constructs, such as scripted events. For example, a game object might represent a sequence of sound effects that should play after a character has reached a certain area of the screen. In that example, we could think of both the character and the group of sound effects as “actors” within the event. Although events are often scripted within the source code of the actors themselves, it can be useful to abstract events away from actors, especially for events that can occur in multiple places or triggered by multiple actors.
One way to maintain such an abstraction is to use the publish/subscribe design pattern. This can be done using the GameScene.globals table, a global table that can be accessed by all game objects in the scene.
----------------------
-- EventManager.lua --
----------------------

local lass = require("lass")
local class = require("lass.class")

local EventManager = class.define(lass.Component, function(self, arguments)

    arguments.events = arguments.events or {}
    self.base.init(self, arguments)
end)

function EventManager:awake()

    if not self.globals.events then
        self.globals.events = {}
    end

    for event in ipairs(self.events) do
        self.globals.events[event] = {
            listeners = {},

            trigger = function(self, component)
                -- alert all listeners that an event was just triggered,
                -- and which game object triggered it
                for i, listener in ipairs(self.listeners) do
                    listener:eventStart(component.gameObject)
                end
            end
        }
    end
end

return EventManager
-----------------------
-- EventListener.lua --
-----------------------

local lass = require("lass")
local class = require("lass.class")

local EventListener = class.define(lass.Component, function(self, arguments)

    arguments.event = arguments.event or ""
    self.base.init(self, arguments)
end)

function EventListener:awake()

    local listeners = self.globals.events[self.event].listeners

    -- # is the 'length' operator, and can be used to append a list
    listeners[#listeners + 1] = self
end

function EventListener:eventStart(source)

    if self.targetComponent and self.targetFunction then
        local component = self.gameObject:getComponent(targetComponent)

        -- call the specified method of the target component
        component[self.targetFunction](component, source)
    end
end

return EventListener
The EventManager is used to declare all events in the scene. Only one EventManager is needed per scene, but more are allowed. When a component triggers an event, all EventListeners for that event are alerted. Each EventListener for the event then calls a specified target function.
Here is a scene with four squares. Each square contains an EventListener that causes it to change its color every time the space bar is pressed:
--------------------
-- Randomizer.lua --
--------------------

lass = require("lass")
class = require("lass.class")

local Randomizer = class.define(lass.Component)

function Randomizer:randomize()

    local color = {}

    -- not an off-by-one error - lists start at 1 and for loops are inclusive
    for i = 1, 3 do
        color[i] = math.random(0, 255) -- math.random is also inclusive
    end

    self.gameObject:getComponent("lass.builtins.graphics.RectangleRenderer").color = color
end

return Randomizer

-----------------
-- Trigger.lua --
-----------------

lass = require("lass")
class = require("lass.class")

local Trigger = class.define(lass.Component, function(self, arguments)

    arguments.key = arguments.key or " "    -- space key
    arguments.event = arguments.event or ""

    self.base.init(self, arguments)
end)

-- special callback function, like update and draw
function Trigger:keypressed(key)

    if key == self.key then
        self.globals.events[self.event]:trigger(self)
    end
end

return Trigger

----------------------
-- squareprefab.lua --
----------------------

return {
  name = "Square",
  components = {
    {
      script = "lass.builtins.graphics.RectangleRenderer",
      arguments = {
        color = {6, 94, 206},
        width = 100,
        height = 100
      }
    },
    {
      script = "Randomizer",
      arguments = {}
    },
    {
      script = "lass.builtins.event.EventListener",
      arguments = {
        event = "randomize_color",
        targetComponent = "Randomizer",
        targetFunction = "randomize",
      }
    }
  }
}

-------------------
-- mainscene.lua --
-------------------

return {gameObjects = {
  {
    name = "Event Manager",
    transform = {},
    components = {
      {
        script = "lass.builtins.event.EventManager",
        arguments = {
          events = {"randomize_color"}
        }
      }
    }
  },

  {
    name = "Event Trigger",
    transform = {},
    components = {
      {
        script = "Trigger",
        arguments = {
          event = "randomize_color",
          key = " "
        }
      }
    }
  },

  {
    name = "Tile Map",
    transform = {
      position = {
        x = 50,
        y = -50
      }
    },
    components = {
      {
        script = "lass.builtins.tilemap.TileMap",
        arguments = {
          map = {
            {1, 0, 1},
            {0, 0, 0},
            {1, 0, 1},
          },
          tiles = {"squareprefab.lua"},
          tileSize = {
            x = 100,
            y = 100
          }
        },
      }
    }
  },
}}
The finale:

Parting thoughts
Lass is far from what would be considered a complete game framework. It makes use of only a small fraction of the LÖVE engine’s API, and is missing essential features such as camera scrolling and image animation. Furthermore, the amount of overhead that would result from creating a scene with thousands of game objects, instead of at most a few dozen, remains to be seen.
In fact, I think the beauty of making a modular framework is that it will probably never feel “complete” and doesn’t have to. Because Lass’s functionality comes from its components, adding new functionality is just a matter of making new components. Developers could create their own “plugins”—packages of custom components—and share them with each other, just as is done with Unity. The flat class hierarchy and independent nature of components mean that no one component, even if it’s in the standard library, is more inherently valuable or important than another. While creating my own modular framework has been far from an easy task, knowing that I’ve laid a strong groundwork for accessible, collaborative, and consistently designed creation has been well worth it.